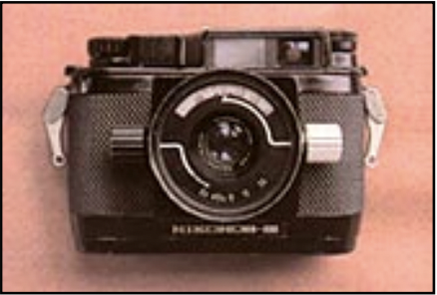
It has been written that one day there shall come a great flood that will forever change the way you think about life. If that day comes to your Nikonos III camera, you had better be like Noah and have two of everything in your "Ark" of camera goodies. Reason: Nikonos III's are so mechanically "encapsulated" that they become the most difficult of the Nikonos cameras to EFFECTIVELY field-clean!
For those of you who own a Nikonos III, you probably have taken refuge in the "myth" that some where, some time, you were told that IF EVER your Nikonos III got flooded that it was a simple matter to clean and restore the operations of the camera without any serious damage (or you having to send it to someone for servicing, and costing you big bucks!). And why not have this (mis-) understanding since it seems to be commonly repeated when a camera other than a III got flooded: "Oh, too bad! You should have owned a Nikonos III. They are so easy to rinse off and clean up that nothing will be damaged!" When you hear people say something like this often enough, you begin to believe it (until it happens to you!).
Top of PageI hope that once you begin to understand just how your Nikonos III camera is really designed that the term FLOOD CLEAN-OUT will take on a new meaning in your camera knowledge.

Mechanical Unit Design: People have longed for a camera that is "encapsulated" against their own "little human mistakes". Many of the new designs built into the Nikonos III were centered around "encapsulating" major areas of the camera's main mechanical components such as: (1) enclosing the center of the main film spool/main spring with a full sleeve, (2) enclosing the complete lower mechanical unit, (3) "hiding" the film counter assembly, (4) adding a film sprocket but encapsulating it in the main frame, (5) enclosing access to the actual flash contacts, etc. These steps, I feel, were done in order to reduce the likelihood of those "little human mistakes" (water droplets) from being able to easily enter, and damage, major mechanical components, and the "big human mistake": do-it-yourself "field modifications". The changes were greatly appreciated by everyone UNTIL IT CAME TO CLEANING OUT A FLOOD!
For explanation of the term "encapsulation", let me draw a comparison between cleaning out residues of an open ended pipe vs. a soft drink bottle. With a pipe opened at both ends, simply forcing water into the pipe from one end will allow for the water to rinse out the pipe's other end and "EFFECTIVELY" CARRY AWAY all of the unwanted contaminants without re-contaminating other areas of the pipe with the unwanted resides in the process. But, with an "encapsulated" bottle which has only one hole into the interior of the bottle as well as the same way out, once it is full of water any additional efforts to force more rinsing water into this "encapsulated" item will only allow that incoming water to immediately pour right back out of the mouth of the bottle (neither cleaning the bottom nor sides of the bottle; just wasting time and water).
And because of the encapsulation design, you will not able to EFFECTIVELY clean out this camera after a flood ÿ simply y using the ole "myths" of merely rinsing off the camera and then drying it! The key word in all of this is "EFFECTIVELY"! To most people, this means cleaning the camera in their room, restoring to like-new status, and using it for the rest of the trip getting perfect pictures!
Top of PageSince you will be immediately addressing the flood situation, generally there will be insufficient time for any serious corrosion of metal parts to occur. Therefore, there are no real benefits of fully disassembling the camera piece by piece just so each piece can be held in your hand and rinsed and dried separately in 1-2 minutes (then spend hours trying to reassemble it correctly), vs. 10 minutes of your time slowly rinsing, and an additional 50- 60 minutes slowly drying these same parts while they are all still assembled. Remember, if you begin immediate cleaning, then a full disassembly should only be required if parts must be replaced (how many spare shutter blades you got in your camera case?)
Therefore, for the "in-field" disassembly that I will discuss in this article, I suggest the only tools necessary are (1) a set of jeweler screwdrivers and a pair of tweezers (from an electronics store), or (2) a Swiss Army knife. I really recommend the Swiss Army knife because it has a pair of tweezers, the pointed tip of the knife blade will easily unscrew tiny Phillips head screws as well as straight tip screws (if the screws aren't already corroded from other mistakes in the past), and probably most importantly of all is that it will prevent temptations from getting into your head to further disassemble the camera (and really "unscrewing" things up).
WARNING! Whether it is additional ideas you may get in your head from this article, or some underwater photography book, or just your plain gutsy attitude! It is for certain that you will only cause further damages to occur: disassembly and reassembling aren't easy nor straight forward procedures for a Nikonos III!
Top of PageOnce water has been discovered inside the camera, do not flood the camera in the "fresh" water trash can on the boat! This "fresh" water typically has been trashed out during the day by being contaminated with salt water and greasy substances like soap (mask defog) and suntan oils, etc. Simply close up the camera and then find a cool, shaded spot (like the ice chest) for that hot sunny boat ride back to the pier (don't let the salt water dry out: it will form insoluble concrete-like residues on the internal parts if it dries before you begin the clean-out procedures). If you have got to drive any distance, better buy an ice chest. If the lens didn't get flooded, DON'T remount the lens to the camera! Also, remember to turn off the strobe and remove the flash cable from the camera (the battery's current flows through the cable and into the camera's wet metal parts and starts corrosion). Remove the film, and turn the shutter speed dial off of "R" and trigger the camera 3 times to reestablish the sprocket gear operations!!!
Even if a little water has gotten in, you still must treat the camera as though it has been totally flooded! There ain't no such thing as being "a little pregnant"! Therefore, your efforts to EFFECTIVELY clean-out the camera must be done so that not one part gets corroded or rusted by either the accidental flood from salt water or your intentional flood with fresh water!
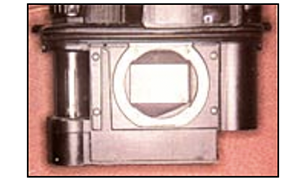
Top of PageLike removing the cap off of the soft drink bottle, the only way to effectively introduce rinse water into the encapsulated mechanical chamber of a Nikonos III camera is to remove the electronic flash contact platform from the end of the camera (left camera, photo 3). Please follow the following steps, and don't short cut them!
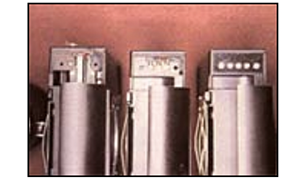
Step 2.1: Unscrew the two Phillips head screws, and lift off the thin shinny black cover (middle camera, photo 3).
Step 2.2: With a wide flat head screw driver or knife blade such that it spans completely across both notches of the nut, unscrew first the nut on the blue wire and CAREFULLY lift off the wire coupler from the threaded post with a pair of tweezers. Next, repeat this step for the red wire.
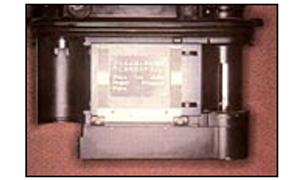
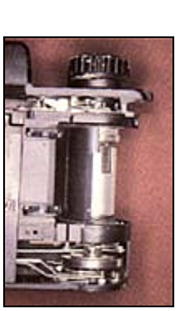
Step 2.3: Now, while repeating this step for the black wire nut, realize that this nut not only secures the black wire but also secures the large black plastic platform to the camera's frame (right camera, photo 3).
Step 2.4: Lift off the platform and watch out snagging the wire terminals in the process.
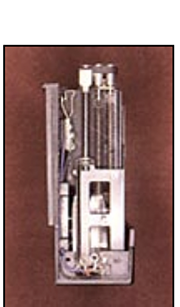
Step 2.5: You will now have a limited viewing hole of the internal "guts" of the camera. First, you will see the shutters and their guide rod. Then, firing the trigger, you will notice that the shutters move upwards further allowing you an opportunity to look further into the "guts" at other mechanical parts. (Photo 4 shows things you won't be able to see through the hole: getting a better understanding now of the meaning of my term "encapsulated"?)
Top of Page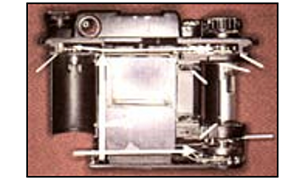
PRECAUTIONS: Now, herein lies the BIGGEST secret of effective cleaning! The right side of the camera contains the major mechanical gears with their respective gear greases (photo 6). The left side; shutter blades with their linkages which must remain absolutely free of any contamination, especially oils and greases (photo 4)! Oils and greases are not soluble in water, but with the passage of water under pressure (faucet), globules of grease and oil can become dislodged. And using hot water will guarantee loosening of grease globules into what was thought to be your "clean rinse water" (now sloshing around inside your camera and contaminating parts, including the shutters!). And if you use alcohol as the final "drying agent", then you better stop to remember that oils and greases are very soluble in alcohol; "drying out" your camera this way WILL contaminate everything for sure.
Just remember the above analogies (pipe vs. bottle). There ain't no hole of equal or larger size on the other end of the camera for the "contaminated" water to rapidly drain away from the camera: this water must slowly seep, by gravity and your patience, out of the camera "guts" through the cracks between the parts (photo 5)!
Step 3.1: Hold the camera's left opened end under the flowing water, and maintain the right side downwards and below the point of water entry during the entire process!!!
Step 3.2: Using cool water only, begin to fill the camera's internal chamber. Once the water level begins to rise to the level of the mouth of the entry port (that you opened), reduce back the amount of flow of the water such that gravity's "DRAIN OUT" is always equal to or greater than the faucet's "flow in". Rinse for 10 minutes or more!
Step 3.3: Now, increase the water pressure and flush for two minutes the "encapsulated" film take-up spool and film sprocket assemblies by holding these areas directly under the running faucet.
Step 3.4: VERY IMPORTANT! During rinsing, occasionally trigger the camera, and rotate the take-up spool by hand. Then, with the trigger cocked, turn the shutter speed dial to "R" and rotate the sprocket by hand; then turn the dial to any other speed setting and continue to rotate the sprocket until it re-locks.
Step 3.5: Patience! Remember, "drain out" is slow because the water can only escape from between the small openings of the camera by the forces of gravity. Hold the camera in this position and drain for at least 3-5 minutes after turning off the water. Occasionally shake the camera (don't beat it to death!) to aid water removal. Take your time and stick with it: patience here really pays off later!
Step 3.6: Flush out the outer casing.
Top of PageAfter rinsing out the camera, the old "myths" of leaving the camera soaking "until you get back" has greatly been misunderstood and misrepresented. "Until you get back" WHERE: your room at the hotel, the photo pro's shop, or back home a week later?
Time is of the essence! Remember, you don't want the camera to start drying out while salt water is still present before rinsing (salt and other mineral salts will harden to the metal parts and CAN NOT be re-dissolved), nor can you leave the camera "soaking" (and rusting) in fresh water for several days.
You've got just a few hours after the flood to COMPLETE everything, drying included! After rinsing, you must use a hair dryer r for both its ability to generate heat as well as to generate a constant flow of air throughout (this means through and out of!) the camera.
QUESTION: No electricity in your remote area? Then you shouldn't be taking modern technology into areas of possible harm unless you are willing to suffer the consequences of a loss. (NOTE: At this time this was written there were no practical and affordable battery energy storage systems which we do have today. This could be away around this isssue, assuming the system will hold a charge for the duration of your vacation/travels/holiday.)
QUESTION: What about using an oven? You will find plastic parts melting at even "low" settings like candle wax!
QUESTION: What about a film drying chamber? This is a slow moisture release chamber to prevent the film from shrinking up like fried bacon. If you want to rust a camera quickly, use this chamber.
QUESTION: What about compressed air? Air pressure does not dry anything, it only moves it around! Put a drop or two in a glass, then blow air into the glass and watch the drops not only explode into smaller drops but also they remain no matter how long you continue to blow air into the glass! Air pressure can damage parts, too!
QUESTION: No hair dryer? Then take up underwater hockey using your camera. That's about all it will be good for in a few days. So, use a hair dryer: it's your only way !
Use a towel as your hair dryer "no fall off the table" pad. For all drying sequences, maintain the dryer about 6 inches from the camera on a medium heat setting (8 inches for a high setting on a low/high only dryer; don't use the low setting at all). Also, just lay the outer casing by the camera during the drying sequences (10 minutes).
Top of PageStep 4.1: Place the camera face down with its opened end (where you removed the plastic platform) facing the dryer. Lift up the rewind crank assembly and film plate. Dry the camera for 10 minutes. (Purpose: drying the lower mechanical gears, operational components of the shutters and the rewind crank gears.)
Step 4.2: Leaving the camera flat on its face, rotate the camera so that the film take-up spool side of the camera is facing the dryer. Dry for only about 10 minutes (maintain dryer distance: this spool is thin plastic). (Purpose: drying the extremely encapsulated areas of the film take-up spool and, more importantly, the film sprocket area.)
Step 4.3: Now stand the camera on its head (trigger "out" acting as a tripod so that the camera will sit more securely up-side-down on its head). Again while the spool side is facing the dryer, dry for another 10 minutes. (Purpose: drying water trapped in the film counter area hidden up under the camera's head, and the main spool.)
Step 4.4: Stand the camera right-side-up, the front of the camera facing the dryer. About 5 minutes is all you need here. (Purpose: just to remove any water trapped in the big opening where the lens goes.)
Step 4.5: Now that some cooling has occurred, repeat Step 4.3.
Step 4.6: Repeat Step 4.1 again.
Step 4.7: Repeat Step 4.3 one more time.
Step 4.8: At this point, the camera should be dry. Examine for the presence of water and any rust/corrosion at: the interior of the camera through the "opened port"; trigger the shutter in "B" and 1/500 speed and examine front and back of each shutter and check for rough gear operations; move the take-up spool by hand forwards and backwards to be sure it is freely moving; function the "R" rewind gears inside the sprocket for smooth release/reengagement operations and verify that the film sprocket is moving (as you did in Step 3.4, but this time without the water, of course!). Dry again if water is seen.
Step 4.9: Reassemble. DO NOT INSERT THE CAMERA INTO ITS OUTER CASING UNTIL ALL COMPONENTS OF THE PLATFORM HAVE BEEN COMPLETELY REASSEMBLED!
Step 4.10: Use the Nikonos Workshop article (Spring 1990) to clean the lens mount ring of the outer casing, and Summer 1991 for techniques to evaluate the shutter speeds and electronic flash synch.
Top of Page1. Since Noah had advanced notice about flooding, he gathered two Nikonos cameras into his "Ark" of camera goodies just in case.
2. The "encapsulated" Nikonos III "bottle" ain't easy to "EFFECTIVELY" clean after the great flood, contrary to what you may have heard.
3. The magic steps in an EFFECTIVE flood clean-out are getting started immediately, flushing "flow in left; drain out right" with only good quality water, drying thoroughly, and working the camera operations during flushing and drying. It is not in total disassembly of the camera by an unqualified person! Leaving the camera to soak for days only causes rust, regardless of the quality of water!
4. Dry, (do not melt!) the camera "through and out of" with a hair dryer (not the sun, an oven, the film drying box, and never with alcohol).
5. Check out the camera using the techniques from Summer 1991, and periodically check the camera for the next three months. If problems appear and you require professional servicing after all, your immediate actions will certainly reduce the ultimate cost of required repairs.
6. Remember above all, know your final rinse water (and bottled water as well)! Even if the camera were to be professionally disassembled piece by piece, and then rinsed in lousy water, the final result would be mineral deposits left on every metal part that will permanently ruin your camera's operations. If in doubt, use either deionized or distilled water as the final, FINAL RINSE water before drying!
Top of Page