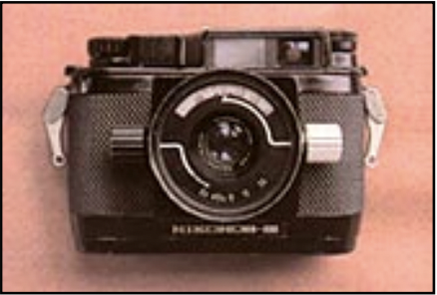
Because human mistakes cause expensive damages, here I go again devoting the first of two articles totally to just one part (A PLASTIC ONE this time) of your Nikonos III camera: the "head of the camera", the "view finder assembly", or as Nikon calls it, the "Top Cover" assembly. And with good reason!
A human can cause damage to occur to many different areas of this plastic Top Cover "cork". And in much the same way that a damaged cork in an expensive bottle of a 10-15 year old vintage wine slowly lets in air to the wine without you knowing it, the Nikonos III "cork" slowly lets in water. Regardless which damaged cork you've got, the results are pretty much the same. When you go to use it, you find out everything has turned to......"vinegar"!
Next, this complete assembly (alone costing WELL OVER the $100 mark without any labor or any other damage) is typically the single most stupidly damaged component of a Nikonos III by a human and which, in and of itself, can lead to the complete (meaning no longer economical to repair) destruction of your camera and the loss of its use forever.
So, let's examine the Nikonos III's plastic Top Cover "cork" and how the human "corks and uncorks" it, and uses and abuses its special features to find out how the camera could quickly be turned into..... "vinegar".
At the same time that the underwater-use Nikonos III was being produced, every land camera manufacturer including Nikon made use of a hinged "back door" (and a door lock) so that the film compartment could be unlocked and swung open for film loading and unloading. It was not necessary to take off the lens to change film.
However, in the design of the watertight Nikonos III camera, Nikon used the lens as the "key for the lock" which locked and unlocked the camera for film changing. After FIRST unlocking this camera (removing the lens!), the lifters were only for accessing the film compartment. This immediately meant 2 frustrating things were going to occur to the user of a Nikonos III: (1) they could not rely on their extensive knowledge of top-side camera use to even load film into the darn thing (where's the back door?), and thus, (2) heaven forbid anyone should find out, but they had to actually read the owner's instruction manual or get help from someone!
What followed, even to this day, were two serious problems that were caused by either the "I know it all's" or the "I forgot it all's" and the "WHOOPS FACTOR"!
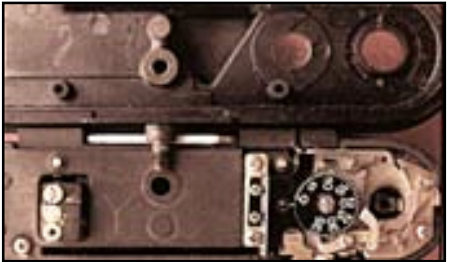
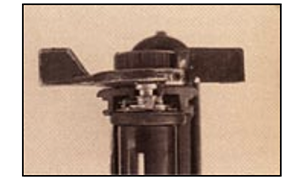
Top of PageThe 5 1/4 inch long plastic top cover of the Nikonos III is held onto the main mechanical "guts" by ONLY ONE Allen head screw! (photo 1) That's right, ONE SCREW, and a METAL one at that, screwed through a hole in the center of the thin metal upper frame of the "guts", and into the bottom side of the PLASTIC top cover. (You can see this screw when you take off the lens, right in the center top of the lens mount hole of the "guts".)

So, guess what? When the lens was stupidly left on the camera while you hurriedly reached for the lifters to pry open the camera to change film and get back into the water, what you did was to lift up the left and right sides of the head with the lifters while the center of the camera was locked in position. This put stress onto the center of the upper metal frame (where the Allen head screw is located) causing it to be bent, obviously, upwards. The result was that the head no longer fit flat on the main frame of the camera, but rather on top of a "mountain peak"...the bent frame!
Since pieces of broken plastic ain't layin' at your fins, no damage occurred, right? So, after saying the customary "WHOOPS, I forgot to take the lens off" followed by a look-see and the other famous words, "ain't nothin' broke", you reloaded the camera and went back into the water feeling confident that everything was all right.
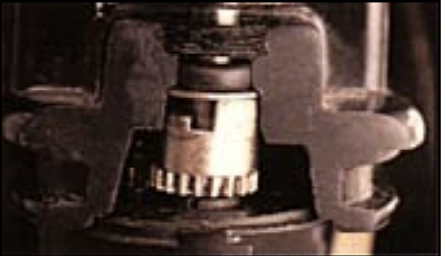
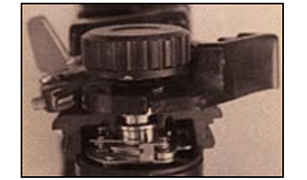
So, where's the problem? Its on the rewind crank handle side, where a 1/2 inch tall metal gear is located (Photo 2). This gear is used not only to translate the motion from your cranking of the film rewind handle (outside the camera) to the rewinding of the film back into the canister (inside the camera), BUT to hold in place a metal washer which, in turn, holds the REWIND CRANK AXLE O-RING in place within the O-ring port pocket of the head to keep everything water tight!
So, when you "WHOOPSed" the top cover, you instantly bent the main frame (in the center of the frame where the screw hole is) and elevated the top cover (now sitting permanently on top of the "mountain peak" bent frame), causing a gap to occur between the tall gear/metal washer and the O-ring/O-ring pocket in the top cover. The result: when you pull up on the rewind crank to wind the film, the O-ring stays in its pocket in the top cover; BUT, when you push the crank back down, the O-ring is popped out of its O-ring pocket, and water leakage occurs on your next and all subsequent dives.
No, it is not a full flood so that you could recognize that a problem had occurred and get immediate servicing, but typically a continuous diabolical, hidden from your view, seepage. (By the way, since only about a 1/2 inch away from this rewind gear area is a large open hole where the shutters are, water gets in there very easy also! Examine Photo 1 now a little more closely for corrosion!) Its not until a couple of days later, when everything begins to dry and freeze up, do you realize a problem has happened.
Can the bent frame be corrected? Easily, after disassembly of some parts, of course. Can I check the camera for signs of a bent frame myself, or does it have to be checked by a service center? Yes, you can, and I will explain how later on.
Take the above WHOOPS FACTOR #1, and let's go one step further with your destructive mistakes. With the lens still mounted to the camera while you continue applying more leverage to the lifters to pry out the "guts", the main frame is bent, all right! But only just so far before it stops. What follows is that the top cover is practically pealed off like a popbottle cap. You not only strip the screw right out of the plastic screw mount, but you break the plastic mount itself (photo 3) which is the top cover! The result! Usually big flooding, which occurs during your ascent.
NOTE! In addition to the above, guess what? Breaking this plastic screw mount can also occur when you try to install an accessory on top of the top cover if you don't exercise counter-tension with your hands. Just be aware of this point for now. It will be covered in detail in a later Nikonos Workshop issue.
Can a broken Allen screw mount be repaired without a full head replacement? Yes, in about 60-70% of the time. But it ain't easy, it ain't cheap, and you darn sure won't be able to use those lifters again. If the repair surgery is determined to have been as success, then my "follow-up therapy" is to permanently remove your lifters from your camera to prevent temptation!
Take WHOOPS FACTOR #1, double the "great ape" strength you applied to the lifters in WHOOPS FACTOR #2, and now, in addition to a bent frame and broken center mount, the head is cracked in the O-ring channel and can't be fixed: it must be replaced. As crazy as its sounds, there are those of you who don't know your own strength and don't know when to stop forcing the lifters, or loaned your III to a friend who forgot your instructions, or bought a "swinging deal" used III from someone (especially a land camera store!). I constantly see cracked heads, and on occasions, I even see III's where someone pried off completely the left 2/3rds of the head with the lifters. Really dumb!
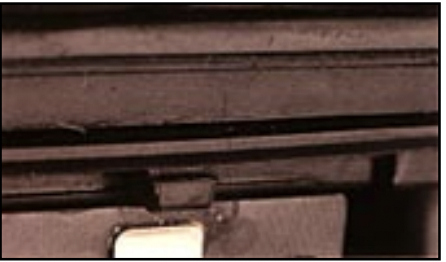
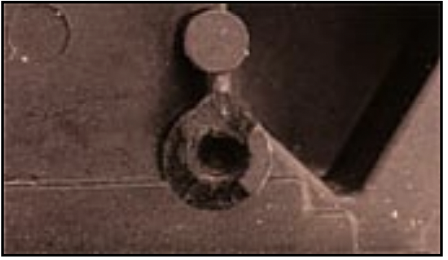
Look at Photo 4 closely. Do you see a hair? Do you see a vertical line to the right? Now, putting these together, you have a "hairline" crack! Dumb analogy, granted, but even a crack so small and so fine as a hair will cause water leakage onto critical camera gears.
Unless you know where to look, the crack is hidden from view by both the main O-ring and all the O-ring grease. It is located in the same place every time: it runs vertically in the main O-ring grove, always to the right of the film-plate retaining thumb latch (Photo #4), and appears like only a harmless scratch. To see if a crack is present, you must remove the "guts" (after taking off the lens, of course!), remove the main O-ring and degrease the Oring channel in this area with either a Q-tip or soft tissue. Using your 35mm Nikonos lens magnifier, inspect for the scratch/crack. If a "scratch" is found in this area, the head is BROKEN. Any further underwater use will allow water seepage (not full flooding that you can see) and additional expensive damage to occur to internal operations (unless things like the counter and shutters longer move.....meaning you should of checked for the "scratch" sooner)!Top of Page
First, understand that the plastic top cover is mounted to the main body of the camera by only one metal screw. Also, with the untimely use of the lifters by a human, you can apply tremendous leverage which will separate the top cover from the main frame or break it all together.
Since it is the combination of the camera's lifters and a human's hands that causes this "WHOOPS! I forgot to take off the lens first" damage, one or the other must be given up when opening the camera! But which one?
Obvious: DON'T EVER USE THE LIFTERS again! In fact, tie a rubberband between them as a reminder to you not to use them ever again.
Top of PageRemember, don't you, that the CENTER mounting point of the camera's top cover is in the CENTER of the camera's main frame (located in the top wall of the lens port)?
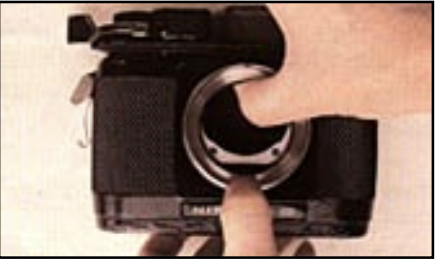
"Wait a minute...CENTER, CENTER....I get it now! If the lifters are rubberband together to remind me not to use them, then I won't. Then, to get the "guts" out of the casing to change film, all I have to do is use my thumb to push out the "guts" from the CENTER of the camera. And I also know one more thing: doing it this way means I'll have to FIRST remove the lens. Then, sticking my thumb into the lens mount hole, and then putting pressure in an upwards direction against the CENTER MOUNTED Allen head screw while holding the outer casing in my other hand (photo 5), I can safely push open, rather than lift (pry) open, the camera without breaking anything! Did I get it right?"
Yes, but as usual there is one more thing to consider here. After the camera has been opened, the O-ring cleaned and regreased, and everything reassembled, then sometime within 36-48 hours of the very last opening the O-ring will take on a "memory seat" between the "guts" and the outer casing. This means that your "thumb lifter" probably won't be strong enough now to push out the camera "guts" to open the camera.
I recommend that if you know that you are not going to use the camera the next day, then take off the main O-ring, reinsert the "guts" back into the outer casing, and REMEMBER to either rubberband the "guts" to the outer casing or (I prefer) replacing the lens with its Oring still mounted. This way, the "guts" won't fall out of the casing accidentally and hit the floor the next time you go to pick it up to use, and you won't have a "memorized" main Oring fighting against you.
Regardless of lifters or thumb, always open your III upside-down after diving. This way, the water droplets on the O-ring fall down into your lap with gravity, not into the camera. More on this, and the reasons why in a later issue. For now, just remember to do it this way!
Top of PageThere are several tests that are easy for you to do, but remember that you yourself can't fix it if it's bent! Only a professional can!
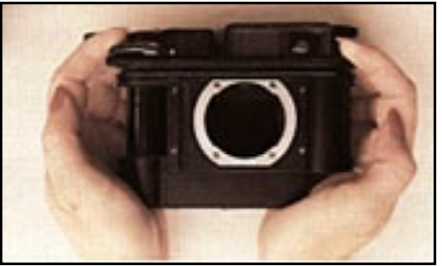
Test #1: Holding the base of the "guts" by the edge of the palm of both hands, extend your fingers so that they can be placed on each side of the top cover at the lifter flanges (photo 6). As a point of visual reference, there are two straight metal ledges extending out from just under the top cover (photo 7). Now, alternate pressing downwards onto one of the lifter flanges at a time and see if the top cover teeters (that is, if the top cover raises up on the right side,relative to the right ledge, when you press your fingers down on the left lifter flange, and visa versa).
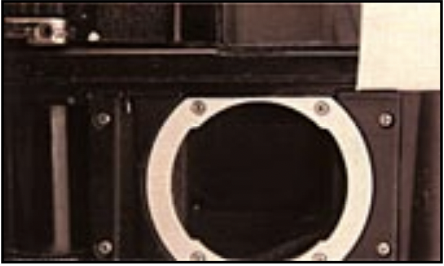
Some movement is normal, but only up to about the thickness of two sheets of notebook paper. If the movement causes a gap of more than the thickness of a business card (photo 7) to occur between the right (rewind side) ledge and the top cover, get the camera checked out!
Test #2: With the camera fully assembled, lens installed, and setting upright on a table, firmly press downwards with the flattened palm of your hand evenly onto the top area of the top cover. At the same time you apply the pressure, trigger the camera. If the trigger now springs out very slowly (as compared to when no pressure is applied), this indicates that there is a problem with your camera. Usually it means that the frame is bent, but it could also mean that the internal O-ring are horribly filthy from your poor preventative maintenance techniques. Either way, you need professional servicing to both your camera and the gray matter between your ears.
Top of Page1. Human mistakes, better known as the "WHOOPS FACTOR", are subtle but deadly to a Nikonos III camera.
2. The 5 1/4 inch long plastic head or "top cover" of a Nikonos III is held onto the main mechanical unit by only one metal screw! A metal screw screwed into plastic threads...wow! But it is enough to keep the head onto the camera under normal-use conditions.
3. Since the lens is also the locking device which holds the camera together, using the lifting levers on the side of the outer casing to pry out the "guts" of the camera to change film while the lens is still mounted isn't a normal-use condition. It's the "WHOOPS FACTOR"!
4. This "WHOOPS! I forgot to take off the lens" mistake by the human will either cause the top cover to be broken and/or the breaking of the plastic mount of the head (repairable, but not cheap) and/or bending of the main frame of the camera (easy to fix).
5. Regardless of the extent of actual damage caused by which ever "WHOOPS FACTOR", each one will additionally cause water leakage to occur, thereby adding to your cost of repairs already required.
6. Rubberband together the lifters as a reminder not to use them. Learn to use your thumb like a "Little Jack Horner", and keep your camera in "plumb good condition"!
7. Learn the symptoms and signs of damage caused by the "WHOOPS FACTOR" and apply them every time before you buy, rent, loan or use a Nikonos III.
Top of PageThis is the second of two articles just on the plastic head (top cover) of a Nikonos III camera, and what the "human" can do to it to damage it beyond repair. And why does it take so much information to learn how not to damage the most sought-after of all the Nikonos cameras: it's the human's ability to destroy a rock, even with their best of intentions of how to properly use the camera or use available accessories.
Top of PageNo doubt Columbus was flatly given "good advice" 500 years ago by "knowledgeable" people when it came to the question of the world being flat or round. Today's Nikonos III "Columbus" is confronted with the question: TO LEAVE OR NOT TO LEAVE the camera either trigger cocked or trigger extended so that the shutter springs are not stored with undue tension remaining on them! There are so many grossly misinformed ideas about this topic that are eagerly offered as "correct information" by people who would never admit that "they don't know the answer for sure". Well, to answer this question, lets first talk about the ACTUAL camera functions of just what the trigger is doing inside the camera, and when. Once this is understood, and you will prove it to yourself, the answer will become crystal clear once and for all.
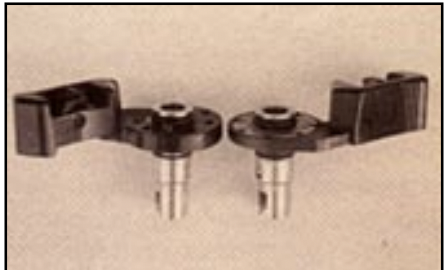
The trigger of a Nikonos III (photo 1), this one piece itself, is designed to perform three operations: (1) fire the shutters, (2) re-cock the shutters, and (3) advance the film. So, get your own camera and let's see these operations for ourselves.
With the shutter speed dial set to "B" and looking at the shutter blades of your Nikonos III, when you depress the trigger to "fire" the camera, you will observe that one of the shutter blades goes up into the camera. Next, only slightly releasing the trigger, you will observe that the second shutter closes, likewise, upwards. Then, when you SLOWLY release the trigger so that it "springs" itself fully outwards, you will observe that both of the shutters are pulled downwards and.....RE-COCKED. That's right, for those of you that have been leaving the trigger out all these years thinking you have been keeping tension off of the shutter springs, think again!
And, if you think that you have been keeping tension off of the main spring of the trigger, you don't know this spring very well. As camera springs go, this one is massive. Also, for any spring to "spring", it must be under tension in the first place. So, if you think that this little 70 degrees of spring relaxation to a massive, already coiled and under tension spring is going to make any real difference, it might in a hundred years or so.
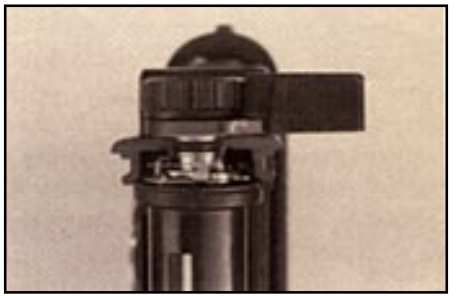
But, what is for sure is that leaving the trigger extended for storage, or while diving when you are out of film, or for any other reason you think of, will allow this extended "appendage" to become an easy target to get bumped or pressured. The total trigger of a Nikonos III is actually a whole lot more than just that which you can see: it is actually a "dogleg" device (photo 2) whose metal must go through an O-ring sealed PLASTIC hole of the PLASTIC head of the camera before it can join with, and function, other internal metal (camera) parts.
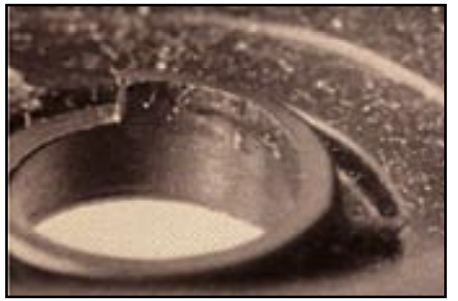
So, when your ALWAYS EXTENDED outer portion of the trigger gets BUMPED (or PRESSURED from your storing the camera in your "foam-lined" camera case, and sitting on the case to close the "foam-lined" lid), this causes the inner metal portion of the trigger to be forced sideways against the plastic O-ring wall. And like any "metal pry bar", the inner metal part of the trigger either forces ridges into the plastic O-ring wall of the plastic head (causing water leakage), or cracks the plastic O-ring wall (causing leakage or flooding). By the way, the thickness of this O-ring wall of a Nikonos III is only about 1/16 inch of "gen-u-wine" plastic! Wow! (photo 3)
So, I think you will now be able to answer the question YOURSELF of "to leave or not to leave" extended the trigger of a Nikonos III for any reason. Leave it fully cocked, meaning that the trigger is always brought back parallel to the head, and locked when not in use.
"But, when I run out of film, the trigger can't be pulled back to a cocked position. It always stays out". If this is your excuse of how you damaged the camera head and caused a flood when your camera gear and every part of your body got smashed into the boat during a choppy dive day, then here's what you should do before getting onto the boat. Turn the shutter speed dial to "R", bring the extended trigger to the cocked position, and then lock the trigger. Its that simple!
Top of PageOver the years, Nikonos III users demanded, and many a manufacturer was willing to make available, accessories with the idea in mind of providing the Nikonos III owner a more convenient and easy way of doing certain photographically required functions. Some were made of plastic; others were metal. And they each had their own way of being attached to specific parts of the camera. Regardless of the material, in their own way each could cause damage to occur to parts of the camera and/or the total camera from an over zealous installation of the accessory or its use in that all-inclusive environment we have come to accept as diving.
True, there have been many a beautiful photograph of a photographer's finger(s) taken with a Nikonos III camera. The reason was that the normal configuration of the trigger was such that the photographer had to place an index finger onto the top of the camera to fire the shutter. Since typically the middle, ring and little fingers were not designed to be detachable from your hand, where ever your index finger went, the other fingers were close behind.
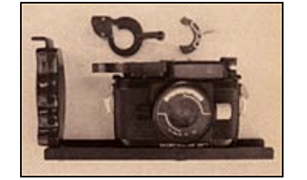
To eliminate this problem, longer camera trays with pistol grip handles became available, and thumb-assist add-on triggers became a hot selling item in nearly all dive shops. But, as discussed above, since extensive damage could be caused from just the single-appendaged Nikonos III trigger itself getting bumped by any number of things when left extended, with an add-on trigger you now had two appendages (the Nikonos one extending out to the front and the add-on extending out to the back of the camera) with which to target your bumping so that you could be sure to damage your camera! Now, you couldn't even safely lay the camera down flat on its back any more.....UNLESS.....you were wise enough to discover that turning the shutter speed dial to "R" would allow you to cock the trigger and, thus, have it parallel with the camera (not sticking out to get bumped) while the thumb assist extension was also brought parallel with and protected by the pistol grip handle.
Top of PageAdd-on (plastic or metal) triggers (photo 4) are mounted TO the camera in only one of two styles: style-1 (metal) mounted directly to the side of the camera's trigger and also just under the edge of the shutter speed dial (photo 5); style-2 (plastic) mounted under and completely around the bottom edge of the shutter speed dial. And, of course, each could easily cause its own unique form of damage to a good Nikonos III when bumped of pressured, even when the trigger consciously was returned to a parallel cocked position as described above (to prevent that group of problems).
Style-1 of metal attachment, instead of damaging just the shutter speed dial when bumped (a $30-40 part if no flooding), damage could also further occur to the trigger's plastic Oring port of the plastic head in just the same way as if the trigger itself had been bumped!
Style-2 of plastic add-on trigger attachment, when bumped, would nearly always cause the pencil-lead thick shutter speed dial axle to be bent, causing the dial itself to sit sideways exposing the O-ring and, flooding! Sometimes, the impact can even peal off the shutter speed dial like a can opener to a bottle cap! And, if you wanted to inspect the camera in this area for possible damage, the device obscured the view.
[SIDE NOTE: From 1975-79, Nikon produced what amounts to 4 different styles of Nikonos III cameras, internally and/or externally (believe it or not). As for thumb triggers, there two distinct styles to consider (see photo 1): cameras with serial numbers before 3165xxx (about 75% of total production) had a THINNER all-metal trigger assembly while later production had the THICKER plastic/metal composite trigger. Unfortunately, style-1 of metal add-on trigger was never redesigned to fit onto the latter, thicker, plastic trigger directly. So, in the "HUMAN tradition" of making a "square peg fit a round hole", humans forced this metal add-on onto the plastic trigger (photo 6), and frequently the plastic part of the camera's trigger was broken off. Anyway, just remember that this style of device was not designed to fit onto the latter series of Nikonos III's.]
For more on this topic of different versions of the Nikonos III see:
Lastly, all add-on thumb-assist triggers, once mounted to the camera, typically never got removed for cleaning. And, thus, all add-ons allow for undue buildup of corrosive salt deposits causing premature failure of the rubber O-ring and damage to the metal shutter speed dial and trigger.
Add-on thumb triggers are really a convenient accessory for the Nikonos III user. But they are also a convenient way to cause unsuspecting damage if their use is not properly safeguarded. So, if you just got to use an add-on thumb-assist trigger, regardless of style, just be careful and watch out for the pit falls of bumping which are so common in the life of a diver. If you leave it mounted to the camera's trigger when storing the camera in the foam-lined camera case, then leave the trigger cocked and locked, and don't store the camera in an upright manner in the case; lay it flat!
Top of PageEven when merely performing the MUNDANE operations of rewinding the film, there are things you should know to minimize serious damage or other problems. Sounds dumb, but let's take a look at these problems.
1. NEVER LEAVE A NIKONOS III ON REWIND The problems generated are many. First, the linkages which release the film sprocket (for passage of the film back into the film canister) are controlled by a very thin 90 degree bent hand. When turned to "R", this hand is forced to depress a spring loaded metal gear. If left in "R" (rewind) for months in while storage, the 90 degree bent hand becomes unbent due to the spring loaded gear putting opposite direction force onto the hand. Then, on the next trip, when you want to rewind the film, the sprocket won't freely release, and you will be looking for a dark room to get the film out of the camera and rewound back into the canister.
2. AFTER REWINDING, TRIGGER THE SHUTTER 3 TIMES That's right ("Dorothy"), turn the shutter speed dial from "R" to any other shutter speed, trigger the shutter three times, and the gears that were disengaged during rewinding will be returned to ("Kansas") their proper operational alignment. This is important not only for the longevity of the gears themselves, but if, during opening of the camera, a drop of water fell off of your face and got into where these gears are located, it would freeze them up into the rewind operation by next morning. If this happens, then regardless of the 4 styles of Nikonos III's that you have, either the shutters will not move or they move (but don't open, and thus no picture). You will also notice that the film will not be transported through the camera.
So remember, if the rewind should become frozen by accident, you want this accident not to damage your USE of the camera. If it is frozen in rewind mode, nothing works. If frozen where you can't get the gears into rewind, you can still safely clear the film in a dark room, then reload the camera, and continue to use it for the remainder of the trip. Don't forget: after rewinding, turn to a shutter speed and fire the shutters 3 times!
3. REWIND CRANK HANDLE AND FLOODING The battle of pulling up the rewind crank handle to rewind the film has always been a treat given only to Nikonos camera owners. However, for Nikonos III owners, this is further complicated by another obligation: to be sure that you don't unscrew the metal rewind crank axle guide pilot (wow! what a description) from the plastic head.
Top of Page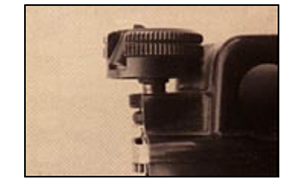
For installation into the camera, this pilot has a slot cut into it so that it can be screwed into the head. It can also come out by being unscrewed. When turning and fighting to get the crank up, even when actually rewinding the film, you can accidentally unscrew this pilot by catching the slot of the pilot with the crank axle. Of course the pilot has only a small job to do: to hold in place the O-ring which keeps the camera from FLOODING!
Before every dive with a Nikonos III, simply inspect visually to see that this pilot has not come unscrewed. Typically, the top of the pilot will be flush with the top of the plastic head. If the pilot is (or appears to be) elevated, take a tooth pick (no metal tools!), place the tip into the screwdriver slot of the pilot, and see if it has really come loose. If it has, then push the pilot (screw it back flush) clockwise with the tooth pick. As long as it is down, it should be safe to dive the camera. And DON'T try to be a genius and glue it in place yourself. The composition of a Nikonos III head is such that the solvents in glue "melt" the plastic quickly. Get professional service when you return.
If the pilot has come completely out of the head, DO NOT try to reinstall it yourself or dive the camera)! It must be professionally reinstalled!
As for the actual operation of rewinding the film, I strongly recommend that you get out of the habit of using the crank handle for anything except pulling up and engaging the crank. The reason is simple, but lengthy. When using a drill to make a hole into a piece of wood, as long as you hold the drill (and drill bit) straight up and down, the hole you will make will be exactly the proper size. But, if you wobble the drill bit OFF OF AXIS while drilling the hole, the hole will become egg shaped, unevenly enlarged, and deformed.
Well, a similar form of deformation occurs when you use the flip-out crank handle to rewind the film. Since the flip out crank handle, when in use, folds out to where it is not on the center line of rotation for the axle (but off to the side), the pressure applied with your hand to rewind the film simply causes the crank axle to be wobbled as you turn the crank handle round and round. This wears the O-ring unevenly, puts scratches into the crank axle, and of course could unscrew the pilot. So, to rewind film, simply use the flip out handle to pull up the crank, flip it back down, and then use only the entire black knob to actually do the winding. I know it is inconvenient and slow, but this procedure will go a long way in eliminating a whole host of potential problems from happening.
And, if you ever had the itch to rewind film underwater for some reason, this could cause water to easily leak into the camera. While this area is O-ring sealed, it is really intended to be a "don't rewind film during diving" O-ring seal.
4. BUMPING/DROPPING THE CAMERA ON THE REWIND CRANK SIDE It may appear only as though you bent the rewind crank handle assembly, and that everything feels and works perfectly. What you may find out is that your rewinding of film becomes more and more difficult day after diving day. "But the camera didn't flood!", you say.
Remember, "flooding" is anything from one drop of water to a fish bowl full of water INTO a camera. And what has happened here is that the plastic wall in the plastic head for the O-ring seat has been cracked allowing water to leak in and corrode (if you are lucky) only the gears. How is this fixed: replacement of the VERY expensive head completely, and any other parts that were corroded! If you have ever dropped your Nikonos III, get it professionally inspected to be sure there was no damages done in areas you can't see.
Top of PageRemember back to the last issue of Ocean Realm where I showed how easy it was to break the one and only plastic mount of the plastic head by untimely use of the lifters. Well, this mount can also be broken by FORCING onto the accessory shoe a tight fitting view finder or other item. First and always, inspect both the accessory holder on top of the camera's head and the mounting shoe of the accessory to be sure each is properly shaped and not otherwise damaged. If they are not, DO NOT force mount the accessory! You will find that you will literally push the head off of the camera while forcing on the accessory.
If nothing appears to be damaged, then as you slowly slide on the accessory from the rear of the head, you the remainder of your fingers to put COUNTER PRESSURE on the front of the head (no, not the front of the camera, but the front of the head!!). This is the only safe way to install an accessory onto a Nikonos III.
If you bump an accessory while it is mounted to a III, you could completely break the one and only plastic mount that holds the head onto the camera (flood), break off the accessory shoe mount of the head, or break off the head itself. So, when diving with accessories mounted to the camera, be careful. If you break loose the three screws which hold the accessory plate to the top of the camera, DON'T decide to become a do-it-yourselfer and put in larger or longer screws and don't use glue. The area under the big camera view finder mountain is hollow, not solid as it may appear. If you cause one of the screw holes to become a camera hole, big time flooding!
Top of Page1.To the question of leaving the Nikonos III trigger cocked or uncocked during storage, "the proof is left to the reader".
2.When you accidentally bump or put undue pressure onto the Nikonos III "90 degree metal pry bar" trigger, you can deform or crack its plastic O-ring wall in the plastic head causing a flood.
3.With either type of add-on thumb-assist triggers, you have two targets to cause damage (and flooding) to the trigger port of the camera.
4.Keep the trigger parallel (cocked) to safeguard it from getting bumped or pressured (on the boat, in the camera case, all the time).
5.Don't leave a Nikonos III on "R" (rewind) any longer than is absolutely necessary (and that doesn't mean you are forgiven if you forget).
6.After rewinding the film, turn the shutter speed dial to any speed, and trigger the shutters 3 times to re-engage the gears before storage.
7.When rewinding (cranking) the film, learn to use the black knob instead of the flipout crank handle. It's slower and not so convenient, but safer for the camera.
8.Inspect the rewind crank pilot before every dive.
9.Accessories mounted onto the top of the head should be inspected for deformations, carefully mounted to the head using counter pressure with your fingers, and always safeguarded from being bumped.
Top of Page